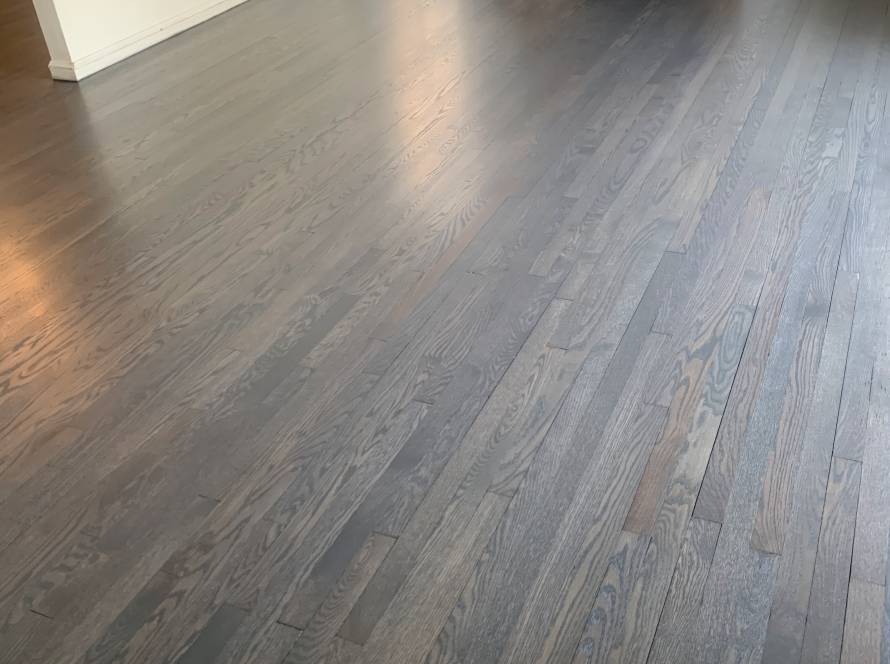
Hardwood floors add elegance and value to any home, but they are not immune to wear and tear. One of the most common issues homeowners face is dealing with scratches that can mar the surface of these beautiful floors. Whether they’re from daily foot traffic, pet claws, or accidental furniture scrapes, scratches can significantly detract from the overall look and feel of your space. The good news is, there’s no need to call in the professionals for every little mark. In this article, we’ll explore how to fix hardwood floor scratches effectively, preserving the beauty and integrity of your floors. From identifying the type of scratch to the final touches in repair, we’ll guide you through each step of the process, ensuring your hardwood floors continue to shine and impress for years to come.
Understanding the Type of Scratch
Before diving into the repair process, it’s crucial to understand the type of scratch you’re dealing with on your hardwood floor. Generally, scratches fall into one of three categories: superficial, deep, and surface level.
- Superficial Scratches: These are the most common and easiest to fix. They only affect the finish of the floor, not the wood itself. They often appear as white marks and can be caused by everyday activities.
- Surface Level Scratches: These scratches are a bit more noticeable, affecting both the finish and the top layer of the wood. They are often caused by pets, moving furniture, or dropping heavy items.
- Deep Scratches: Deep scratches penetrate through the finish and into the wood, often leaving visible grooves. These are the most challenging to repair and might require more intensive methods.
To identify the type of scratch, closely examine the affected area. If the scratch is only visible at a certain angle or disappears when wet, it’s likely superficial. If the scratch is visible at all times and you can feel it with your fingertip, it’s a surface level or deep scratch.
Understanding the nature of the scratch is a vital step in how to fix scratches on wood floor. It determines the method and materials you’ll need for the repair, ensuring that your approach is effective and your hardwood floor is restored to its original glory.
Preparation for Scratch Repair
Before you start the repair process, it’s essential to gather the right tools and materials and prepare your workspace adequately. Here’s what you need and some tips to set the stage for a successful scratch repair on your hardwood floor.
Tools and Materials Needed:
- Clean Cloth or Soft Brush: For cleaning the scratched area.
- Mild Wood Floor Cleaner: To ensure the area is free from dirt and grime.
- Fine-Grit Sandpaper (for deeper scratches): To smooth down the affected wood.
- Wood Filler (for deep scratches): To fill any gouges in the wood.
- Putty Knife: To apply wood filler evenly.
- Wood Stain or Marker: To match the color of your floor.
- Clear Wood Finish: To seal and protect the repaired area.
- Protective Gear: Like gloves and a mask, for safety when handling chemicals.
Preparing the Workspace:
- Clean the Area: Begin by thoroughly cleaning the scratched area with a soft brush or cloth and a mild wood floor cleaner. This removes any dirt or debris that could interfere with the repair process.
- Ensure Adequate Ventilation: Open windows or use fans to ensure good air circulation, especially if you’ll be using products with strong fumes, like wood stain or finish.
- Protect Surrounding Areas: Use drop cloths or old newspapers to protect the area around the scratch from any spills or drips of wood stain or finish.
- Lighting: Good lighting is crucial for seeing the scratch clearly and ensuring a seamless repair. Use additional lamps if the area is not well-lit.
- Safety First: Don safety gear such as gloves and a mask, especially when sanding or using chemical products.
With the right tools and a well-prepared workspace, you’re set to begin the scratch repair process, ensuring a smooth and efficient restoration of your hardwood floor.
How to Get Scratches Out of Wood Floors
Dealing with minor or superficial scratches on wood floors can often be a simple, do-it-yourself task. Here’s a step-by-step guide to effectively handle these minor blemishes, ensuring your hardwood floors look as good as new.
Step 1: Clean the Scratched Area. Begin by cleaning the scratch and the surrounding area with a soft cloth and mild wood cleaner to remove any dirt or debris.
Step 2: Choose Your Repair Method. For light scratches, options include wood markers, wax sticks, or DIY solutions like a mixture of olive oil and vinegar.
Step 3: Color Matching. It’s crucial to select a repair product that matches the color of your wood floor. Test your chosen product on an inconspicuous area of the floor to ensure a good match.
Step 4: Apply the Repair Product. If using a wood marker or wax stick, gently apply it along the scratch, ensuring it’s completely filled in. For DIY solutions, apply the mixture with a soft cloth and rub it into the scratch.
Step 5: Buff and Wipe. After the product has been applied, gently buff the area with a clean cloth to blend the repair into the surrounding wood.
Step 6: Final Clean. Give the area a final wipe to remove any excess product and to ensure a clean, seamless finish.
Discussing the Importance of Testing
Testing the repair product in an unseen area is a critical step in how to remove scratches from wood floors. This ensures that the color and product you choose blends seamlessly with your floor, maintaining its aesthetic integrity and beauty.
Following these steps, minor scratches on wood floors can be easily and effectively managed, preserving the floor’s appearance and extending its lifespan.
Remove Scratches from Wood Floor
Fixing deeper scratches in wood floors requires a more involved approach compared to superficial scratches. Here’s how you can tackle these more prominent blemishes to restore the beauty of your floors.
Step 1: Assess the Scratch. Examine the depth and extent of the scratch. Deep scratches may require sanding and sometimes filling.
Step 2: Sanding the Scratch. Select the right grit of sandpaper. Start with a finer grit and only use coarser grit if necessary. Gently sand along the grain of the wood, focusing on the scratched area. The goal is to level the scratch with the surface without causing further damage.
Step 3: Cleaning After Sanding. Remove all the dust created from sanding using a soft brush or a vacuum, then wipe the area with a damp cloth.
Step 4: Applying Wood Filler. If the scratch is deep enough to warrant it, apply wood filler that matches the color of your floor. Use a putty knife to fill the scratch, then scrape off any excess to ensure a smooth, level surface with the floor.
Step 5: Sanding the Filler. Once the filler is dry, gently sand it to ensure it’s flush with the floor’s surface. Be careful not to sand the surrounding wood.
Step 6: Re-staining. If your floor is stained, you may need to reapply the stain to the repaired area for a color match.
Step 7: Applying Finish. Apply a clear finish to the area to seal and protect the repair. Ensure it matches the sheen of your existing floor finish.
Step 8: Final Buffing. Once the finish is dry, buff the area to blend the repair seamlessly with the rest of the floor.
Addressing deeper scratches in parquet flooring requires a methodical approach. In learning how to fix scratched parquet floor, it’s essential to be patient and precise. Each step, from careful sanding to the final finishing, is vital to ensure a repair that is not only professional in appearance but also blends seamlessly with your existing flooring.
Finishing Touches
Once the scratch repair on your wood floor is complete, it’s important to do hardwood floor refinishing to ensure it blends seamlessly with the rest of your flooring. Proper finishing not only enhances the appearance but also protects the repair for longevity. Here’s how you can achieve a flawless finish:
-
- Matching the Finish. The key to a successful refinish is matching the new finish to the existing floor. If your floor has a specific stain or color, you’ll need to replicate this on the repaired area. Test the stain on a small, inconspicuous area first to ensure a good match.
- Applying Stain. If you used wood filler, apply the stain directly to the dried filler using a small brush or cloth. Work in the direction of the wood grain and apply the stain evenly. Be careful not to overlap onto the surrounding areas to avoid darker patches.
- Sealing the Wood. After the stain has dried completely, seal the repaired area with a clear wood finish. This could be a polyurethane, lacquer, or any other sealant used on the rest of your floor. Apply it evenly and smoothly, following the manufacturer’s instructions.
- Drying Times. Respect the drying times of both the stain and the sealant. Rushing this process can lead to smudges or uneven coloring. Usually, it’s advisable to wait at least 24 hours before walking on the area.
- Aftercare. Once the finish is dry, it’s important to take care of the repaired area to ensure its durability. Avoid cleaning it with harsh chemicals or water for a few days. For ongoing maintenance, use products recommended for hardwood floors and avoid dragging furniture or heavy objects over the repair.
By carefully staining and sealing the repaired area and following proper drying and aftercare procedures, you can ensure that your repair is not only effective but also aesthetically pleasing and long-lasting.
Take the Next Step: Empower Your Floor Repair Journey with STI Flooring Deluxe
We’ve explored a comprehensive approach to dealing with one of the most common challenges for hardwood floor owners: scratches. From identifying the type of scratch, preparing for repair, and meticulously removing both minor and deeper scratches, to the crucial finishing touches and preventive measures, we’ve covered the essential steps to restore the beauty of your hardwood floors.
However, we understand that some repairs might feel daunting or you may simply prefer professional assistance. That’s where STI Flooring Deluxe comes in. Our expertise in hardwood flooring repair and maintenance ensures that your floors will not only be repaired to the highest standard but will also continue to radiate beauty and elegance in your home.
Bring back the splendor of your hardwood floors in Cleveland! Contact STI Flooring Deluxe today for top-notch flooring services tailored for your home’s unique charm.